with a 5th pin that is used to enter "command" mode for changing the module's configuration.
The HC-12 circuit board is built around the STM8S003F3 microcontroller and the Si4463 transceiver.
This module work full duplex communication that means it can be sender and receiver at the same time.
pinout
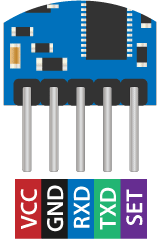
To set the speed and the channel communication of this module you must to put the "SET" pin low level or in another meaning to GND.
after that, the module entering the configuration mode, send the command "AT" for testing and if it returns "OK" then the module has been entered the AT command mode.
AT command
- Baud Rate Commands:AT+Bxxxx
- Channel Commands:AT+Cxxx
- Transmit Power Commands:AT+PX
- knowing the configuration setting:AT+RX
- set to the auto configuration:AT+FUx
- Return to default settings:AT+DEFAULT
The baud rate can be set to 1200bps, 2400bps The default value is 9600bps.
AT+Cxxx The value can be a number from 001 to 127 Example: type “AT+C021”.
AT+PX valid Transmit Power Commands: AT+P1 (-1 dBm), AT+P2 (2 dBm), AT+P3 (5 dBm)
AT+P4 (8 dBm), AT+P5 (11 dBm), AT+P6 (14 dBm), AT+P7 (17 dBm), AT+P8 (20 dBm).
AT+RX The module should return something like this:
“OK+FU3
OK+B9600
OK+C001
OK+RP:+20dBm”.
AT+FUx this can be FU1, FU2, FU4 or FU4 (FU4 at a baud rate of 1200 sets the chip to transmit up to 2000 meter in open air).
to communicate with two module you must set them both as the same configuration.
connect the arduino with the module like this way and after that upload the code below.
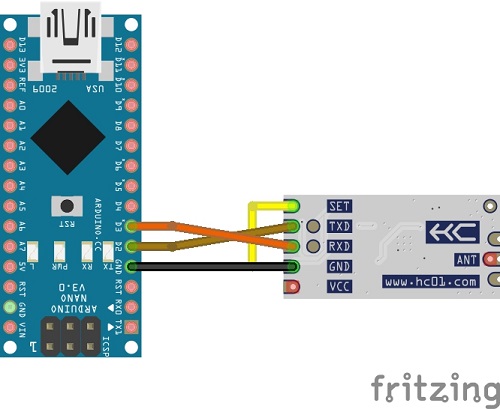
Arduino code
#include<SoftwareSerial.h>
SoftwareSerial HC_12(2, 3); // HC-12 TX Pin, HC-12 RX Pin
void setup() {
  Serial.begin(9600);             // Serial port to computer
  HC_12.begin(9600);               // Serial port to HC-12
}
void loop() {
  while (HC_12.available()) {        // If HC-12 has data
    Serial.write(HC_12.read());      // Send the data to Serial monitor
  }
  while (Serial.available()) {      // If Serial monitor has data
    HC_12.write(Serial.read());      // Send that data to HC-12
  }
}
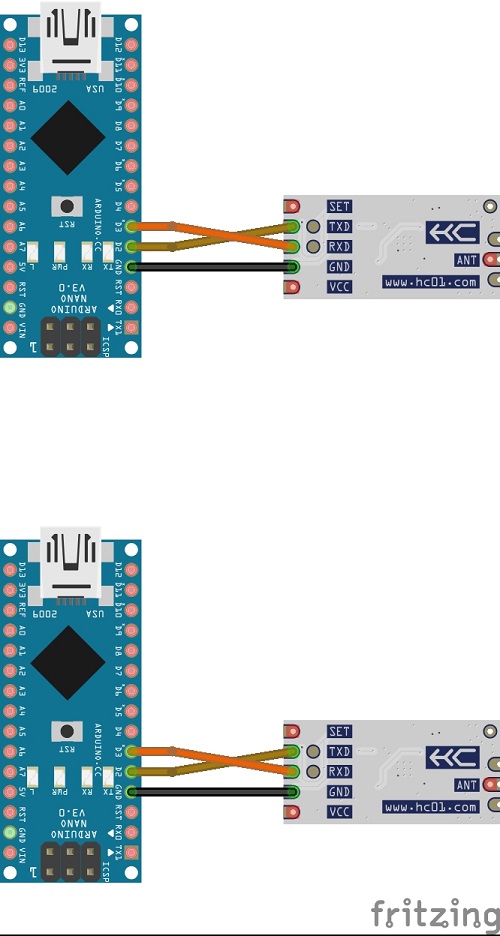
After finishing the configuration we connect two Arduino separately
and open the serial monitor and send data from Arduino A to Arduino B then you will see the data crossing
wireless throw the modules.